Car Sort Level 113 Solution Walkthrough
Route Reference
Key opening, middle, and finish positions for this route.
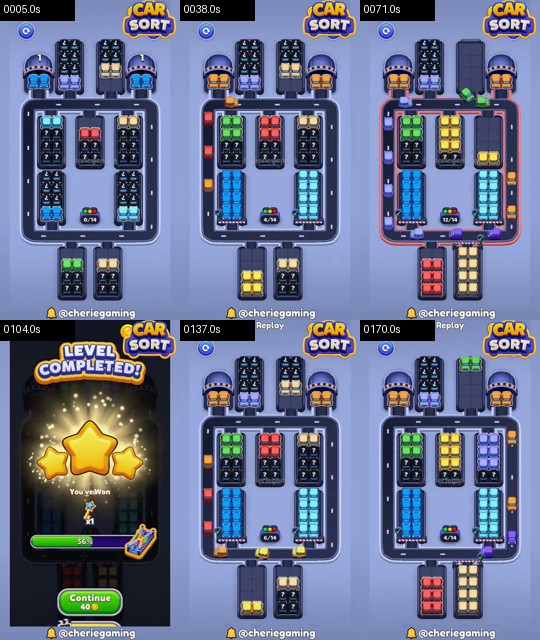
Four Tunnel Towers Above A Square
Level 113 places four numbered tunnel towers above a square road, three large columns inside, two side columns, and two lower bays.
Recommended flow:
left tunnel release -> right tunnel release -> green center-left -> red center -> yellow center-right -> blue left column -> cyan right column -> yellow lower-left -> beige lower-right
Resolve tunnel batches separately. Then clear the three central columns before the side and lower columns.
If a tunnel car remains on the roof, do not open the center. If beige stalls below, yellow or cyan is still using the bottom road. The Level 113 checkpoint is an empty top edge after the tunnels and an empty square before the two lower bays.
Tunnel Release Before Interior Columns
Resolve the left tunnel first, matching its visible cars to their garage until the roof edge is empty. Repeat on the right. Opening several numbered towers together gives their cars nowhere to wait and blocks the entrance to the square.
Green, red, and yellow then clear the three large center columns. Blue on the left and cyan on the right follow after the middle has opened. Let each side column finish before moving to the bottom road.
Yellow from the lower-left begins the final phase, with beige from the lower-right last. Beige needs the right corner completely free, which is why cyan must be parked first.
If any tunnel car remains at the roof, ignore the attractive center matches and finish that tunnel color. If the square is mixed, close the color already nearest its garage. A stalled beige car points back to yellow or cyan on the bottom road. Re-establishing an empty top edge and then a hollow square keeps the phases separate.
Three Square Checkpoints
The first checkpoint comes after both tunnel sides: all four roof mouths and the upper edge of the loop should be quiet. The second comes after green, red, and yellow: the three large center slots should be open and no car should be turning around the right side. The third follows blue and cyan, when the square is ready for the two bottom bays.
If your board differs from the route reference, identify the last checkpoint you actually reached. A car on the upper edge belongs to a tunnel release. A car beside the broad center columns belongs to green, red, or yellow. A car on either side of the lower edge belongs to blue or cyan. Finish that source before moving down a phase. Yellow can then enter from the lower-left and create the gap beige needs at the lower-right. Opening beige while yellow still travels removes the only free corner, so wait for a visibly empty bottom edge.
That final empty-corner check is the simplest safeguard against an unnecessary restart.