Car Sort Level 91 Solution Walkthrough
Route Reference
Key opening, middle, and finish positions for this route.
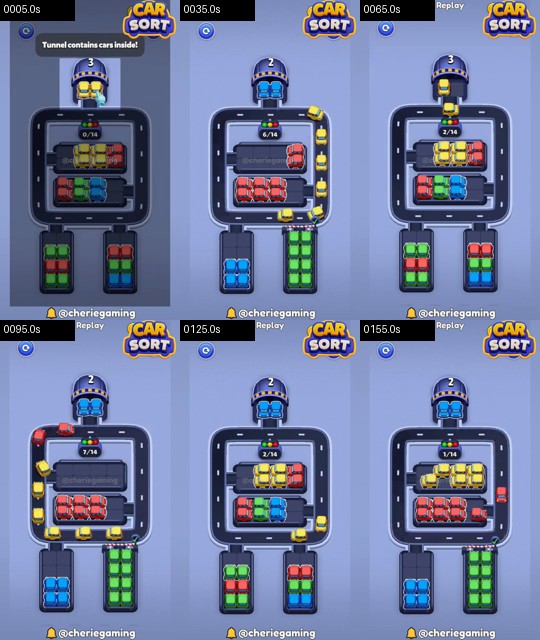
Tunnel Cars Inside A Compact Loop
Level 91 contains hidden tunnel cars, three short rows inside a small square, and four lower garage stacks. The tunnel counter changes which color becomes available, so route decisions should follow the revealed car.
Use this visible priority:
yellow tunnel release -> red center row -> green/blue center cars -> red lower row -> blue lower-left -> green lower-right -> remaining tunnel batch
Finish the color released by the tunnel before opening another lower stack. Keep the loop empty when the counter changes.
If your revealed tunnel color differs, clear the matching garage path first and return to the same board-state rule. The key checkpoint is a clean square with only one tunnel color active; forcing a fixed color when the tunnel shows another is the main way to jam Level 91.
Reading The Tunnel Instead Of Memorizing It
Start by releasing the visible yellow tunnel batch and watch which garage it needs. Complete that color before opening any of the four lower stacks. Red across the center is the next stable target because removing it gives the tunnel cars a full side of the compact loop.
Green and blue in the middle should be handled according to which one has an open garage path. Finish one, return the square to empty, and then finish the other. Red on the lower row comes after the center. At that point blue on the lower-left and green on the lower-right can enter separately without meeting tunnel traffic.
The counter can make a replay look slightly different after a restart. The reliable rule is board-state based: one revealed tunnel color, one matching destination, and no unrelated lower batch on the loop. When the counter changes, pause until the released cars have parked.
If the square contains mixed colors, stop tapping the tunnel. Move the front car to its matching garage, then finish all cars of that color already exposed. If its garage path is closed, an earlier center row was skipped. Clear that row first. Do not force the listed order when the tunnel visibly reveals another color; preserving a single active batch is the actual solution principle.
Tunnel Counter Checkpoints
Every counter change should happen against a quiet board. Before activating the tunnel again, confirm that the previous revealed color is absent from the square and that its destination stack has accepted the full group. The red center row should be gone before the lower blue and green stacks begin, because it occupies the short horizontal space both lower colors need.
If you lose track of the sequence, ignore covered stacks and read only the frontmost tunnel car. Its color tells you which garage path must be open. Clear any matching exposed cars already on the loop, let the square empty, and then return to the counter. This method handles small replay variations without guessing. The compact road has enough room for one color batch, but almost none for an exploratory second batch.