Car Sort: Color Puzzle Level 326 Solution Walkthrough
Route Reference
Key opening, middle, and finish positions for this route.
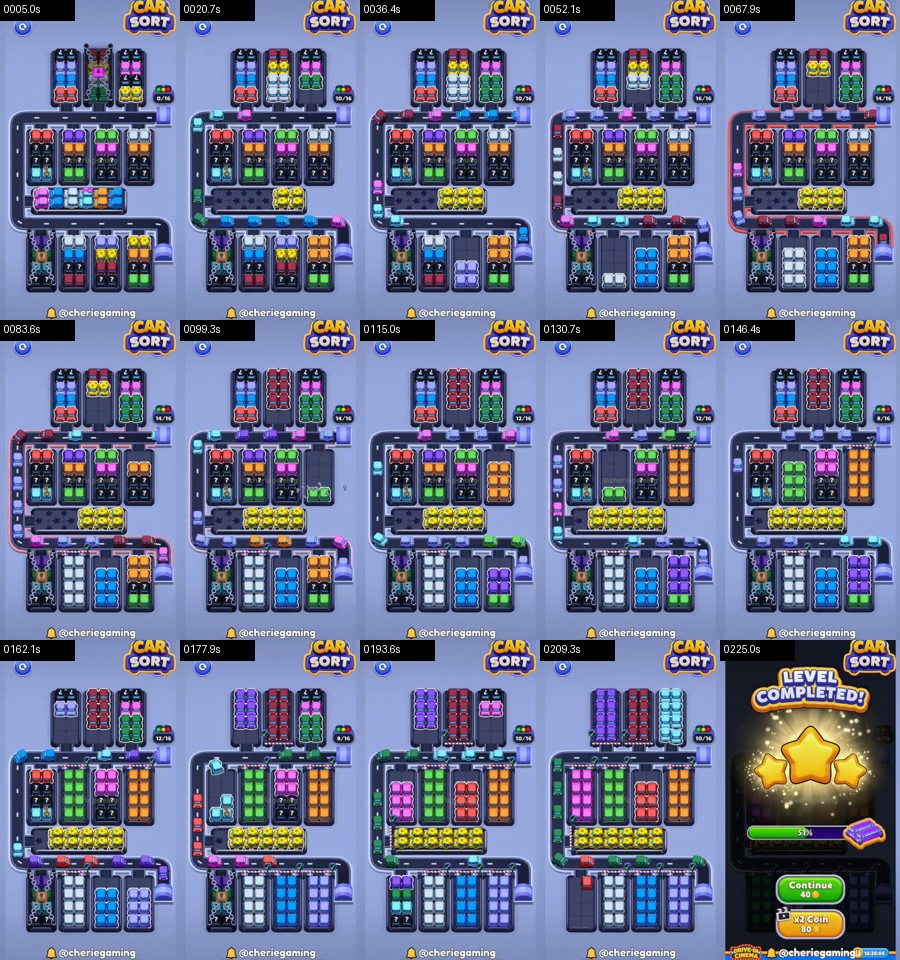
Read the three-band layout
At the start, the central garages expose red, purple, pink, and orange, with pale cyan and green visible deeper in the stacks. The upper reserves hold additional blue, red, yellow, pink, and green cars. The chained lower columns are not usable yet, even though some of their colors are visible.
Follow this broad order:
red center → purple center → pink center → orange center → yellow divider → pale cyan and green center → blue/white lower release → upper reserve batches → red, green, pink, and orange cleanup
This is a layered route rather than a strict left-to-right sweep. Within a phase, finish the color whose garage is fully exposed. Do not pull a matching car from the upper reserve merely to combine it with a center batch; the upper columns need their own clear road later.
Check the locks before every band change
The locks and chains below the yellow row record progress through the center garages. They are better guides than the visible number of cars. After red and purple, the upper road should be clear but the lower chains should still be closed. After pink and orange, the yellow divider should have an uninterrupted exit. Only after yellow, cyan, and green complete should the lower columns begin acting like normal reserves.
If a chain animation starts, let it settle before tapping. A newly exposed blue or white column can look immediately available, but a center car may still be travelling through the same vertical connection.
Empty the compact center garages
Start with the red group on the left side of the center band. Red has immediate access to the outside road and its departure exposes the lower part of the first garage. Purple follows from the next shelf. Clearing it keeps the upper road free for the pink batch.
Move pink as a complete central group, then orange on the right. Orange is close to the road entrance, but opening it before pink can leave a mixed queue along the right wall. After these four colors shrink, the long yellow divider becomes the obvious next checkpoint.
Clear yellow across the horizontal middle row. Yellow is more than another color batch: removing it connects the upper board to the chained lower section. Wait for the full row to finish before tapping the newly visible blue or white cars below.
Use the empty yellow row as working space
Once yellow disappears, its former shelf becomes the widest safe buffer on the board. Preserve that space for the cyan and green handoff. Do not fill it with one car from each lower column. A correct route keeps the row visually empty between batches, allowing the next color to cross from the bottom connection to its garage without circling.
Open the chained lower columns
Pale cyan and green in the center should move immediately after yellow. They use the empty middle band and reduce the locks holding the bottom reserves. Once the chains release, take blue from the lower-right column, then white from the lower-middle column. Keeping those two batches separate preserves the bottom road for the remaining locks.
Purple may reappear in the lower band. Clear that exposed column before returning to the top. It is tempting to start the tall upper reserves as soon as their gates open, but a purple column left below can block the same vertical route those upper cars need.
Confirm the lower-band reset
Before moving upward, check that blue, white, and the returning purple group are no longer occupying the road. The lower columns themselves may still show covered deeper colors, but the entrance beneath the former yellow divider must be empty. This is the second major reset point and prevents the tall reserves from meeting upward-moving traffic.
Drain the tall upper reserves
The top phase releases blue, red, yellow, pink, and green in successive columns. Work on one visible color at a time. Blue is usually the clean first transfer after the lower locks disappear; red and yellow follow through the opened center. Pink and green are safer late because their deeper central counterparts have already left.
Orange returns on the right side during the final transition. Complete it before the last pink or green column if orange is occupying the road entrance. By this stage the center garages should be mostly empty, so the remaining red, green, pink, and orange cars can travel directly rather than circle the outer road.
The late red and green faces are easy to confuse with the opening center batches. Use their location to decide: cars in the tall top columns belong to the reserve phase, while a remaining car inside a compact middle garage indicates an earlier batch was not completed. Always clear the middle remainder first because it controls the shared vertical route.
If Level 326 stalls, identify which band still contains an incomplete batch. A crowded center means one of red, purple, pink, or orange was split. A closed lower chain means yellow or the exposed cyan/green batch remains unfinished. A blocked top exit means blue, white, or purple is still using the lower road. Complete that controlling color before tapping another reserve.
Most single mistakes are recoverable because the cleared yellow row provides space. Commit to the color already inside that row and finish its exposed source column. Avoid introducing a third color as a spacer. Restart only when both the upper and lower entrances are occupied by different incomplete batches and no matching face is exposed in the center; otherwise one full-color completion will reopen the route.
The route succeeds by converting each horizontal band into space for the next one. The compact center clears first, yellow removes the divider, cyan and green release the chains, the lower columns vacate the vertical lane, and only then do the tall upper reserves drain safely into the final cleanup.