Car Sort: Color Puzzle Level 359 Solution Walkthrough
Route Reference
Key opening, middle, and finish positions for this route.
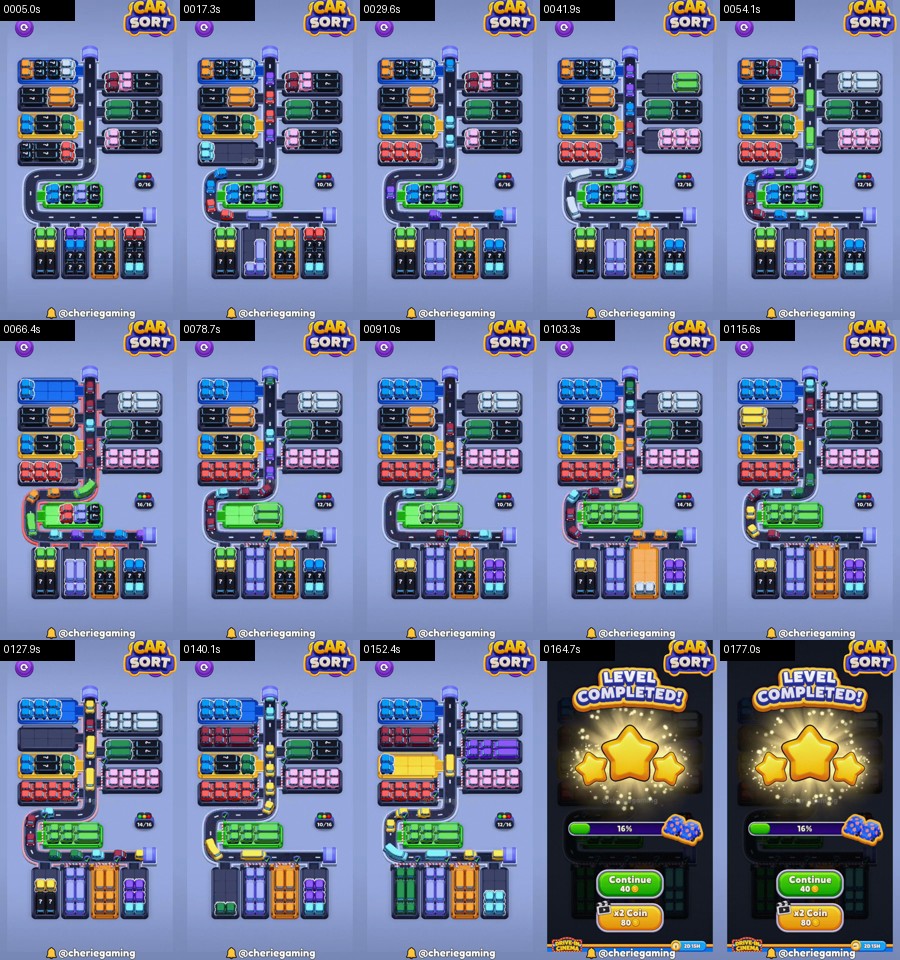
Identify the loop entrances
At the top, orange, blue, pink, and purple columns sit directly over the road. The middle exposes green, cyan, red, yellow, and several covered or numbered cells. The bottom repeats blue, orange, green, pink, red, and yellow. Both outer banks use the same loop, so a color started at the top can block a bottom group even when their garages appear separate.
Use this route reference:
top orange → blue top column → pink and purple → green inner-left → cyan inner row → red center → yellow release → bottom blue/orange → green and pink → red-yellow finish
The route alternates zones only at clean checkpoints. Finish all cars belonging to a visible column before moving to the opposite end.
Strip the top towers
Orange is the safest opener because its exposed column reaches the upper road without crossing center traffic. Blue follows and clears the adjacent tower. Pink and purple then leave in separate groups, producing a broad dark cap over the loop.
If green becomes visible in the center during this sequence, leave it. The last purple marker still needs the upper bend. Starting green too early fills the inner vertical lane and prevents the upper group from completing its turn.
The opening checkpoint is easy to recognize: four upper faces are dark, the horizontal top road is empty, and the first complete green or cyan center face is exposed. If one colored car remains above, complete its tower before proceeding.
Drain the narrow center from left to right
Move green from the inner-left face first. Its removal opens access to the cyan row. Clear cyan fully, then red. These center groups are compact, but their route overlaps for most of the loop, so do not interleave them.
Yellow appears as the middle release color after one of the numbered cells changes. Wait for red to disappear, then finish the yellow face. This creates the decisive empty channel between the upper and lower halves.
At the midpoint, the loop should be visibly open on both sides and the interior should contain dark vertical gaps. A surviving mixed patch indicates that green, cyan, red, or yellow was only partly cleared. Complete that patch rather than beginning the lower towers.
Clear the bottom columns outward
Blue and orange make the best first lower pair. They sit closest to the newly open central channel and leave useful empty garage bays. Green follows from the next exposed column. Pink should wait until green has completed the lower bend.
The final lower rows are red and yellow. Clear red before yellow when red occupies the inside edge of the loop. Yellow can then use the full outer curve for an uninterrupted finish. If an orange or blue remainder is exposed beside them, finish that earlier color first; the late pair should not be asked to pass a stranded marker.
Check the road after blue-orange, after green-pink, and before red-yellow. A clear loop at those three moments is more reliable than trying to remember individual taps. Each empty-road check confirms that the next column owns the route alone.
Why the middle cannot be rushed
Level 359 shows many complete-looking color blocks at once. The important constraint is the narrow interior lane, not mere visibility. Green opens cyan, cyan exposes red, and red provides enough space for yellow. Reversing that order can leave a car on the inside of the loop with no bay to enter.
Similarly, the bottom columns should not start while the center is mixed. Their first cars may move, but the last members of the batch will meet center traffic at the lower bend. The dark interior gaps created by the center sequence are what make the lower run safe.
Fixing mistakes without adding traffic
For a blockage above the midpoint, locate the incomplete orange, blue, pink, purple, green, or cyan face. Continue that face until its marker reaches the garage. For trouble below the midpoint, complete the active blue, orange, green, pink, red, or yellow lower column.
If the loop contains two colors, prioritize the one closest to its matching garage and stop tapping elsewhere. Once that group clears, the other normally has enough road to finish. Do not activate a same-colored column at the opposite end, because repeated colors may be assigned to different faces.
Restart only when the remaining members of both active groups are hidden behind numbered covers. In most other cases, finishing the last visible face repairs the route.
Before the final yellow run, verify that the top towers and center are dark and that no marker remains on either vertical side of the loop. The last column should leave from bottom to top in a steady stream. If the movement pauses at the inner bend, return to the red face immediately.
The Level 359 solution is a clean top-center-bottom progression. The upper towers remove pressure from the first bend, the center colors turn a crowded core into a passage, and the bottom columns use that passage in complete pairs. Respecting those zone boundaries makes the compact replay straightforward to follow.
For a precise final checkpoint, count the dark vertical gaps inside the loop rather than the remaining garage icons. The interior should form an uninterrupted open strip from the former green face down through red and yellow. Any colored break in that strip belongs to the center phase and must be removed before the outside bottom column can make its last circuit.